 |
 |
Saddle Tank Handrail and Lamp
Bracket
| Having decided to
add detail parts to my
Stafford to make it look more like the full size Bagnall 'Sir Tom' the
first part I tackled was the saddle tank handrail assembly because it
looked simple to make and was a "free standing" assembly.
However
despite its apparent simplicity, construction in my relatively basic
workshop proved to be quite a challenge. |
  The
photo on the left shows the finished parts fitted onto 'Gentoo', and at
the cab end you can see that the handrail is mounted on a frame made
from three lengths of mild steel angle (16x16x3 mm) silver soldered
together. The two vertical sections also have spacer strips
soft
soldered to them so that the angle clears the beading that runs round
the top edge of the cab side sheets. The angle section frame
is
mounted to the existing cab plates by two 2BA steel bolts per side and
these bolts were fitted into tapped holes in the side angles so that
they were painted at the same time as the frame. The
photo on the left shows the finished parts fitted onto 'Gentoo', and at
the cab end you can see that the handrail is mounted on a frame made
from three lengths of mild steel angle (16x16x3 mm) silver soldered
together. The two vertical sections also have spacer strips
soft
soldered to them so that the angle clears the beading that runs round
the top edge of the cab side sheets. The angle section frame
is
mounted to the existing cab plates by two 2BA steel bolts per side and
these bolts were fitted into tapped holes in the side angles so that
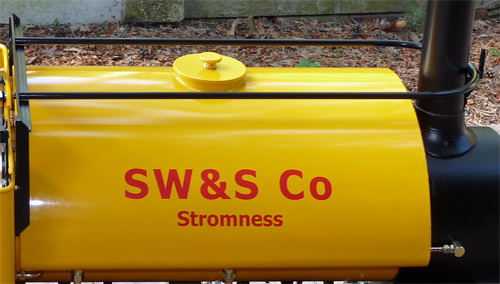
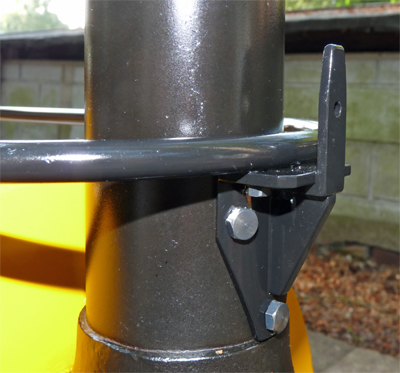
they were painted at the same time as the frame.The photo on the right shows the head lamp bracket assembly that also attaches the handrail to the funnel. As the funnel is obviously round this meant that the mounting plate had to be bent into a curve to match the funnel. Thankfully my home made bending machine (see the Bellmouth Coupling page) quickly bent the 1/8" mild steel sheet to the correct curve. The three other parts of the lamp bracket were then also cut from mild steel and after tapping a couple of 8 BA holes into the vertical web two brass screws held the parts together while they were silver soldered. During the cleaning up process after soldering the two brass screw heads were filed away so that they didn't interfere with fitting the bracket to the funnel (or the handrail to the bracket). The finished bracket was attached to the funnel using three 2 BA bolts fitted into holes tapped into the funnel, with the steel bolts being treated with Metal Black to give them a durable black finish. For those of you who are wondering about the "company name" SW&S Co the answer is at the bottom of this page. |
  The
handrail itself was made from 3/8" (10mm) diameter round mild steel
bar, but
forming the loop shape and then drilling the ends proved to be quite
difficult. After a lot of head scratching I decided to have a
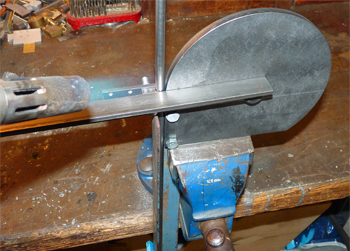
former laser cut from 10mm steel plate. A length of steel
angle
bolted to the side located the handrail ready for bending and also held
the former into my bench vice. A sturdy piece of angle acted
as a
long lever to force a semi circular "shoe" around the outside of the
former, so as shown in the left hand photo the handrail was heated
"bright red" using my blow lamp and slowly but surely the lever bent
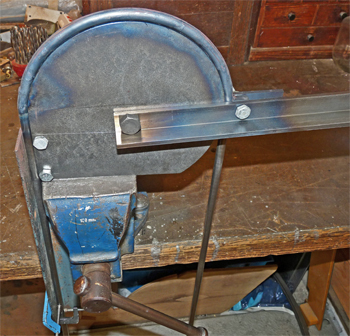
the handrail around the former. The end result is shown on
the
right, a nice smooth 180 degree bend in the middle of a five foot (1.5
metre) long length of mild steel round. The
handrail itself was made from 3/8" (10mm) diameter round mild steel
bar, but
forming the loop shape and then drilling the ends proved to be quite
difficult. After a lot of head scratching I decided to have a
former laser cut from 10mm steel plate. A length of steel
angle
bolted to the side located the handrail ready for bending and also held
the former into my bench vice. A sturdy piece of angle acted
as a
long lever to force a semi circular "shoe" around the outside of the
former, so as shown in the left hand photo the handrail was heated
"bright red" using my blow lamp and slowly but surely the lever bent
the handrail around the former. The end result is shown on
the
right, a nice smooth 180 degree bend in the middle of a five foot (1.5
metre) long length of mild steel round.The bent handrail was then cut to length to fit the already fitted brackets on the cab and funnel, but to complete the assembly I needed to drill and tap a 2 BA hole into the ends of the loops. As the bent handrail could not be put into the lathe I had to find another way to drill the holes down the centre of the bar. |
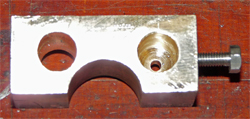  My
solution was to make a drilling jig from a scrap of square section bar
as shown on the left (the half moon cut out was already in the piece of
scrap bar and is nothing to do with the drilling jig). The
two
holes in the jig were 3/8" diameter to fit the handrail, and the hole
on the right was not drilled all the way through so that the smaller
through hole would accurately centre a pilot drill into the end of the
handrail. The 4 BA bolt could be fitted into a hole tapped
into
either end of the block to hold the jig onto the handrail. My
solution was to make a drilling jig from a scrap of square section bar
as shown on the left (the half moon cut out was already in the piece of
scrap bar and is nothing to do with the drilling jig). The
two
holes in the jig were 3/8" diameter to fit the handrail, and the hole
on the right was not drilled all the way through so that the smaller
through hole would accurately centre a pilot drill into the end of the
handrail. The 4 BA bolt could be fitted into a hole tapped
into
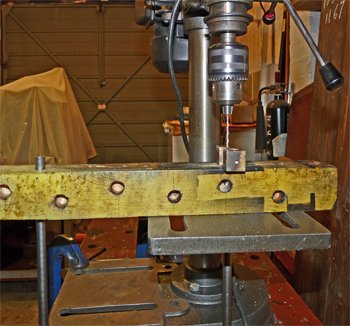
either end of the block to hold the jig onto the handrail.The photo on the right shows the handrail being drilled ready for tapping 2 BA. My bench pillar drill is clamped to the workbench using G Clamps so that the drill head and table could be rotated 90 degrees to "hang" over the edge of the bench. This allowed the handrail to hang down past the drills base plate. The scrap wooden block was drilled through in two places at the correct handrail spacing so that it would keep the handrail square and true to the drill table, while the drilling jig held the handrail in place while being drilled. Both the bending and drilling proved to be very easy and took almost no time at all to do, but the working out how to do it took me considerably longer. The handrail assembly was fitted to the Stafford long before the other parts of the cab conversion, and even by themselves added some more detail interest to the loco. The "company name" vinyl letters were also added at the same time as the handrail, and between them they removed the large area of plain yellow that had originally been created by the Stafford's plain colour saddle tank. Vinyl graphics for lettering etc. are readily available from all sorts of providers, just search the Internet (or your local phone books) and you will find many companies offering vinyl graphics for vans and company cars as well as general graphic artwork. |
| SW&S
Co - The answer. My Stafford was named 'Gentoo' for a variety of reasons, but having spent a few pleasant days on the island of South Georgia watching the wildlife spectacular it gave me an idea for a suitable company name for the supposed loco owners. The chosen company name is genuine, but although the whaling station at Stromness, South Georgia, did have narrow gauge railway track I don't believe they ever operated steam locomotives there (the nearest were I believe in nearby Grytviken). Whatever, the letters SW&S Co stand for the "Southern Whaling and Sealing Company" which operated whaling ships around South Georgia. Although the connections are a figment of my imagination I think that a company based on an island inhabited by Gentoo penguins is rather appropriate. |