Cylinder Drain Cock Outlets
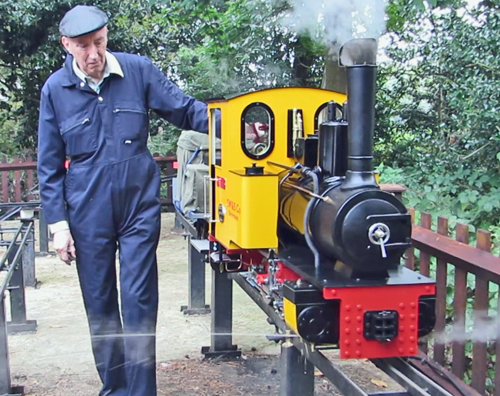 As
soon as I started to drive my new Feldbahn from the steaming bay I
spotted a problem. The very first Stafford locomotives like
my
old 'Gentoo' had cylinder drain cocks that squirted vertically down, so
although they ended up splattering the underside of the loco with
trackside rubbish they didn't spray my friends in the steaming bays (or
worse members of the public in the station) with that nasty oily
emulsion that always appears when the loco has been standing.
The
photo on the left clearly shows the jet of liquid ready to soak anyone,
or any other loco, unlucky enough to be in its path. Not
wanting
to be considered antisocial by my fellow club members (or worse
upsetting a paying passenger by
scalding their feet or ankles) I decided that something had to be done
and set
about designing a solution. As
soon as I started to drive my new Feldbahn from the steaming bay I
spotted a problem. The very first Stafford locomotives like
my
old 'Gentoo' had cylinder drain cocks that squirted vertically down, so
although they ended up splattering the underside of the loco with
trackside rubbish they didn't spray my friends in the steaming bays (or
worse members of the public in the station) with that nasty oily
emulsion that always appears when the loco has been standing.
The
photo on the left clearly shows the jet of liquid ready to soak anyone,
or any other loco, unlucky enough to be in its path. Not
wanting
to be considered antisocial by my fellow club members (or worse
upsetting a paying passenger by
scalding their feet or ankles) I decided that something had to be done
and set
about designing a solution.
The
main problem was that I
didn't want to replace the existing cylinder drain cocks, so whatever I
did had to modify and not replace them. A simple angled
shield attached
to the cylinder cladding was considered but rejected because it would
have looked unsightly and probably have splashed the emulsion all over
the underside of the cylinders and
chassis. Measurements showed that there was insufficient
material
on the drain cock body to screw in pipe unions for outlet pipes, and if
pipes had simply been soldered on it would have been impossible to
screw the drain cock bodies back into the cylinder casting.
The answer
seemed to be an outlet pipe held to the drain cock body by some sort of
clamp, but the more I measured the more awkward this solution looked
because of the position of the cylinder cladding. Eventually
I
devised a solution, and although I could have directed the outlet pipes
straight down I pointed them forwards (as often seen on full size
locomotives) because generally speaking the track in front of a moving
engine is clear of people.
|
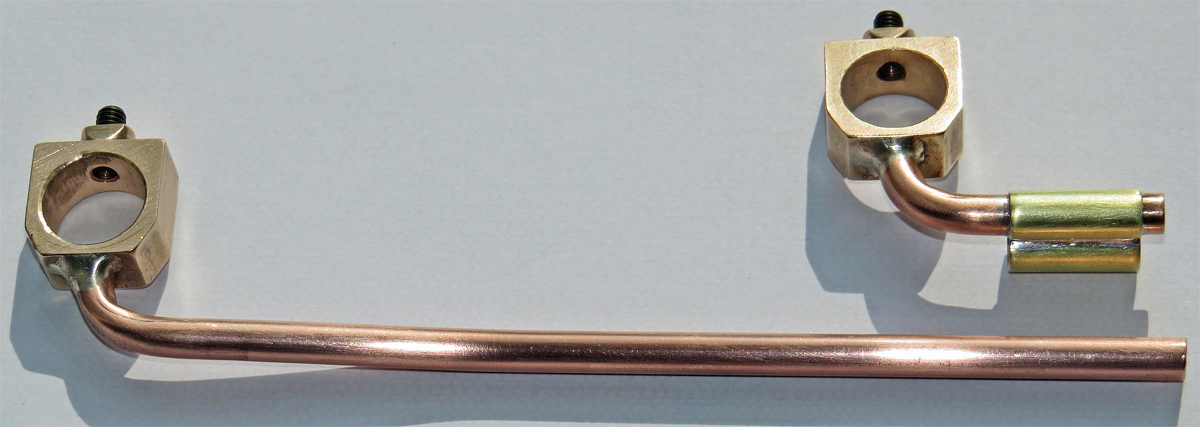 The
photo on the right shows the pair of outlet pipes ready for fitting to
the right hand cylinder of the Feldbahn. The clamp sections
were
machined on my lathe from 3/4" hexagonal section bar and bored to be a
good sliding fit onto the drain cock bodies. On my Feldbahn
this
was exactly 12mm diameter, although I did have to use
fine "wet
& dry" paper to remove the machining burrs from the drain cock
bodies
before the clamps would slide into place. My intention was to
have the clamps as good a fit as possible around the drain cock bodies
to avoid leaks. The 3/16" OD copper
pipes were bent on one of my home made pipe benders (see the bottom of
this page) and silver soldered into the clamps.
Likewise the
brass "figure of 8" section was silver soldered from brass tubing
before being soft soldered onto the outlet pipe of the forward
assembly. The clamps are locked in position on the drain cock
bodies by 4 BA socket grub screws. The
photo on the right shows the pair of outlet pipes ready for fitting to
the right hand cylinder of the Feldbahn. The clamp sections
were
machined on my lathe from 3/4" hexagonal section bar and bored to be a
good sliding fit onto the drain cock bodies. On my Feldbahn
this
was exactly 12mm diameter, although I did have to use
fine "wet
& dry" paper to remove the machining burrs from the drain cock
bodies
before the clamps would slide into place. My intention was to
have the clamps as good a fit as possible around the drain cock bodies
to avoid leaks. The 3/16" OD copper
pipes were bent on one of my home made pipe benders (see the bottom of
this page) and silver soldered into the clamps.
Likewise the
brass "figure of 8" section was silver soldered from brass tubing
before being soft soldered onto the outlet pipe of the forward
assembly. The clamps are locked in position on the drain cock
bodies by 4 BA socket grub screws.
A simple jig was used to
hold the parts together while soldering, and the clamp section was
drilled 3/16" diameter by 1mm deep to help locate the pipe.
The
pipe "hole" was drilled 4mm diameter right through the clamp, and as
the existing outlet hole in the drain cock body was only 2.6mm diameter
on my Feldbahn this allowed a degree of mispositioning to be tolerated
when attaching the clamps without blocking off the outlets.
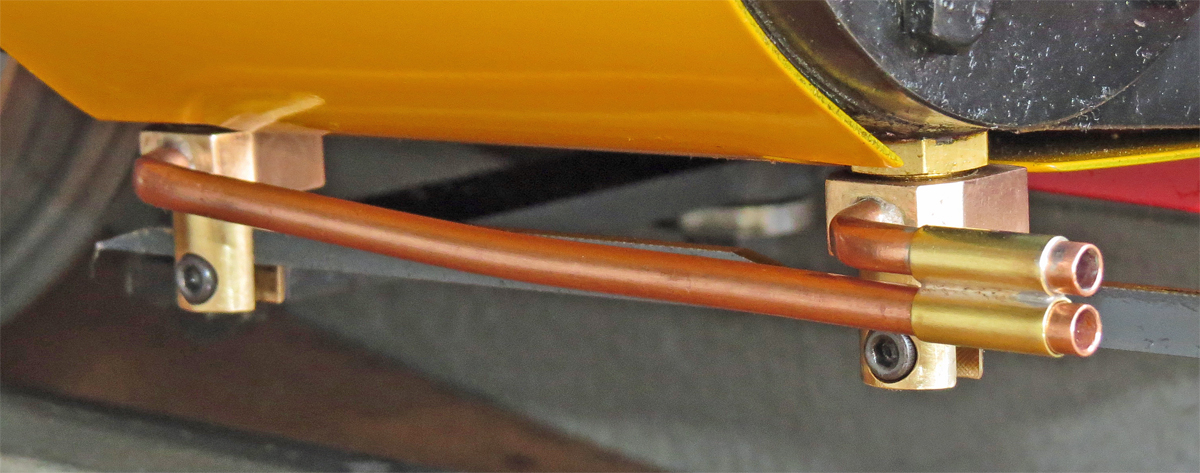 The
photo on the left shows the outlets attached to the Feldbahn's cylinder
drain cocks. To fit them the M3 socket cap head screws in the
drain cock bodies and the operating bar had to be removed, which meant
that the short push rods inside the drain cock bodies fell out.
My tip for replacing them is to overlap half their length
onto a
short bit of masking tape which can then be used to get them back into
position while still allowing the M3 screws and operating bar to be
fitted. The masking tape can easily be pulled off before the
M3
screws are screwed into the second side of the drain cock bodies. The
photo on the left shows the outlets attached to the Feldbahn's cylinder
drain cocks. To fit them the M3 socket cap head screws in the
drain cock bodies and the operating bar had to be removed, which meant
that the short push rods inside the drain cock bodies fell out.
My tip for replacing them is to overlap half their length
onto a
short bit of masking tape which can then be used to get them back into
position while still allowing the M3 screws and operating bar to be
fitted. The masking tape can easily be pulled off before the
M3
screws are screwed into the second side of the drain cock bodies.
|
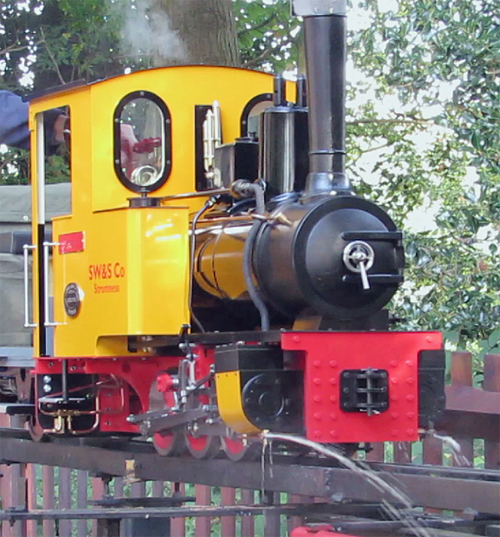 Finally,
here is a photo of the redirected drain cocks in action, and as you can
see they do what I wanted by getting rid of the sideways spray. Finally,
here is a photo of the redirected drain cocks in action, and as you can
see they do what I wanted by getting rid of the sideways spray. |
|
Miniature
Pipe Benders
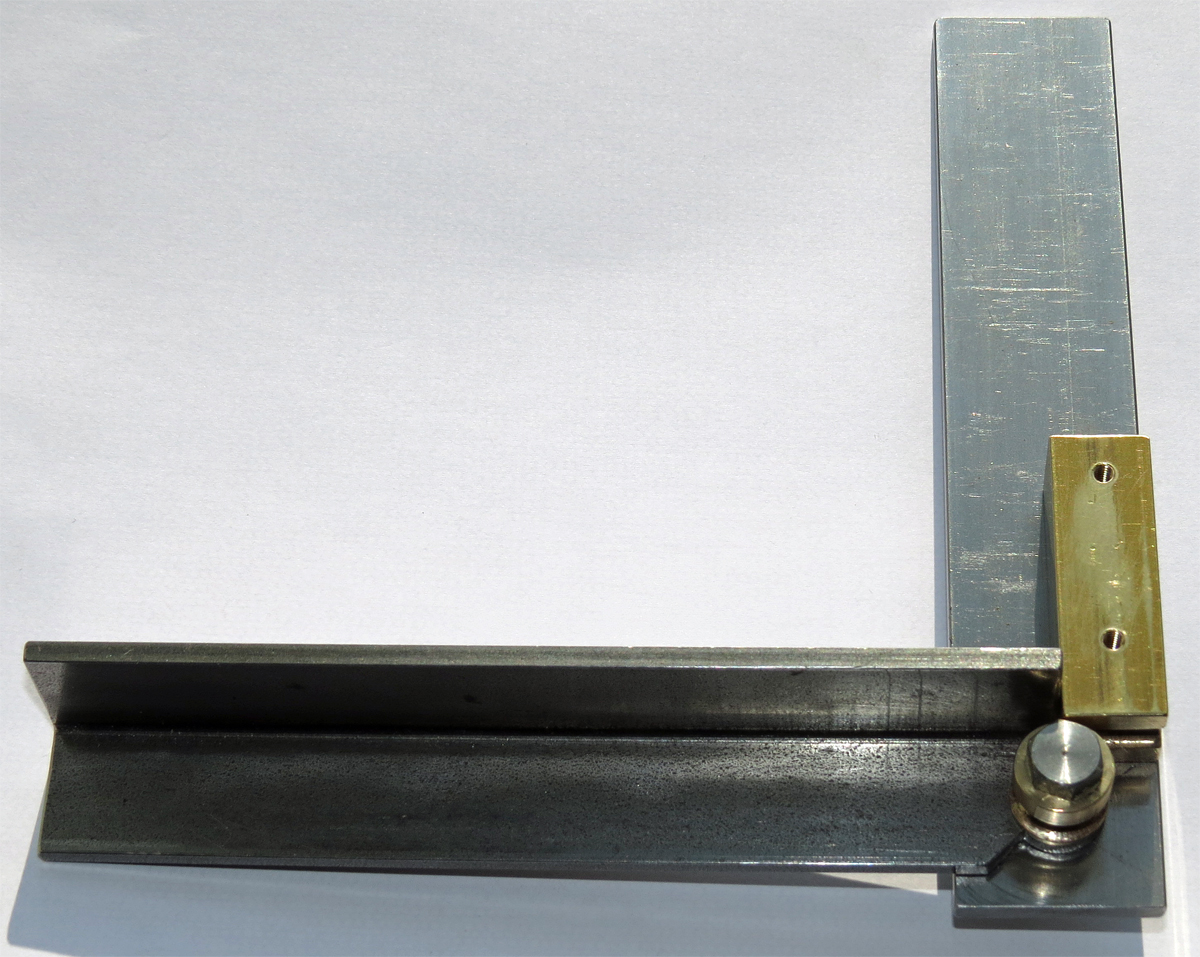 The
outlet pipes needed to have a very tight bend radius which none of my
commercial pipe benders could produce so I had to build yet another
pipe bender (this is my third). All of my benders follow the
same
basic design as this one (shown in the photo on the left) although
those for larger diameter pipes (5/16" and above) incorporate another
bar across the top to "stiffen" the bender. The
outlet pipes needed to have a very tight bend radius which none of my
commercial pipe benders could produce so I had to build yet another
pipe bender (this is my third). All of my benders follow the
same
basic design as this one (shown in the photo on the left) although
those for larger diameter pipes (5/16" and above) incorporate another
bar across the top to "stiffen" the bender.
The main handle
is cut from steel angle, so that the upright section locates the pipe
while being bent. The other handle has a brass die block
bolted
to it which has a half round hole on the "bending" face the same
diameter as the pipe to be bent. The slowest job in building
these
benders (at least for me) is accurately grinding the form tool to be
used on the lathe when turning the mandrel around which the pipe
is bent. The quality of the finished pipe depends on getting
a
precise half round groove turned into the brass mandrel.
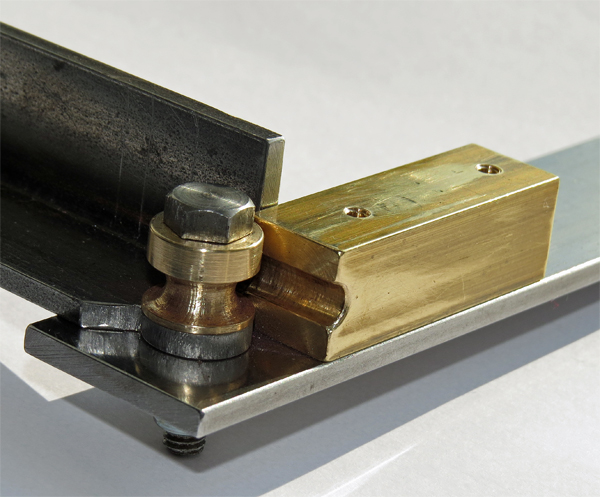 The
other photo shows a close up of the working parts of the bender.
By carefully positioning the pivot pin the mandrel and die
block
end up completely surrounding the pipe, and the upright angle section
will be supporting the outside of the pipes diameter. If the
supported length of pipe is short (and straight) it often helps to
insert a close fitting drill shank into the pipe end to stop the pipe
distorting as its forced against the upright angle, but don't let the
drill get too close to the start position of the bend or the pipe will
develop a bump (or even crack open) rather than forming a neat bend. The
other photo shows a close up of the working parts of the bender.
By carefully positioning the pivot pin the mandrel and die
block
end up completely surrounding the pipe, and the upright angle section
will be supporting the outside of the pipes diameter. If the
supported length of pipe is short (and straight) it often helps to
insert a close fitting drill shank into the pipe end to stop the pipe
distorting as its forced against the upright angle, but don't let the
drill get too close to the start position of the bend or the pipe will
develop a bump (or even crack open) rather than forming a neat bend.
With the
3/16" x 26 SWG
copper pipe correctly annealed this bender was able to produce bends
with an inside radius of only 4mm.
If
like me you have a "scrap" box full of odd lengths of material you will
probably have all you need to construct a pipe bender, and thus be able
to save money instead of purchasing a commercial item.
Another
benefit of this design is that the pivot bolt can easily be removed to
dismantle the bender and thus extract pipes with bends close together.
Both the commercial benders I own are riveted together with
the
result that it is often impossible to get bends close enough together. |
|


