 |
 |
|
Revised Cab Design
 Sadly
other projects got in their way and by the end of January I had got all
the tender parts ready for painting but no progress at all had been
made in turning the CAD sketch into reality. After some more
discussions with Station Road Steam it became clear that I would have
to design and build the cab myself, so the work that had been intended
to be done in parallel with the tender now had to be done after it.
This would set the whole project back several months. Sadly
other projects got in their way and by the end of January I had got all
the tender parts ready for painting but no progress at all had been
made in turning the CAD sketch into reality. After some more
discussions with Station Road Steam it became clear that I would have
to design and build the cab myself, so the work that had been intended
to be done in parallel with the tender now had to be done after it.
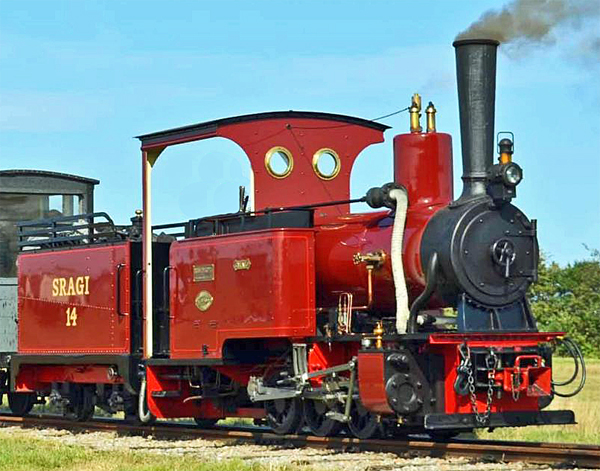
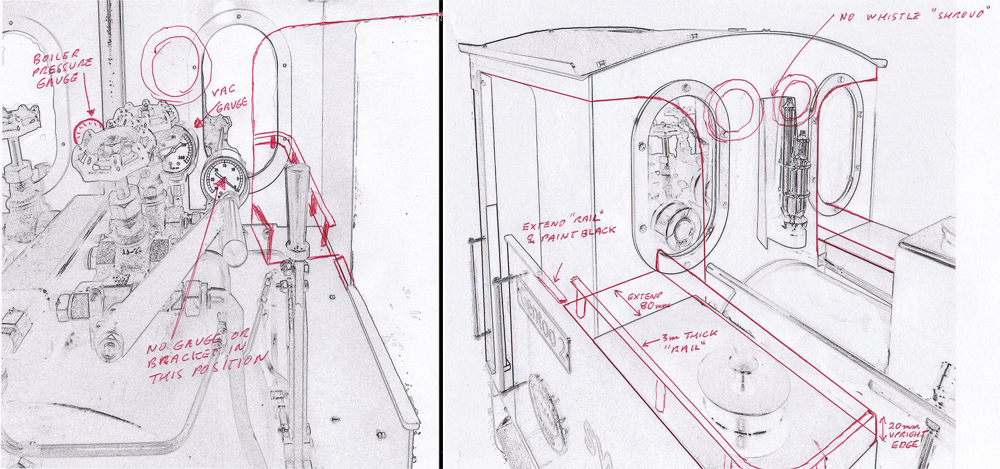
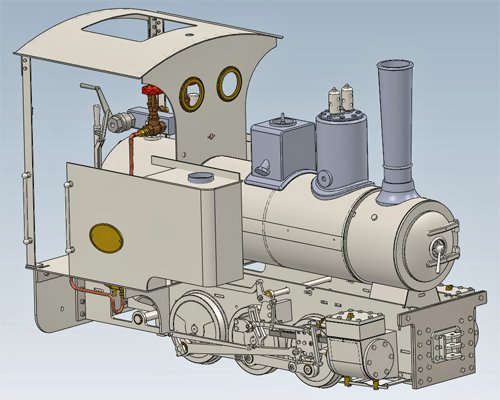
This would set the whole project back several months.Thankfully Mike was able to email me CAD drawings for the original spectacle plate and cab side in a format that my ancient CAD program could handle so at least I didn't have to reverse engineer the design of those parts. I loathe trying to create drawings of other people's parts as with model engineering you never know if the original designer was using metric or imperial measurements. I certainly would never have deduced some of the dimensions of the spectacle plate as the CAD figures did not fit into either the metric or imperial systems. While Station Road Steam have the luxury of 3D CAD I still work with a 2D system so I could never produce a sketch like theirs, but within a few hours I had all the parts designed and ready for laser cutting. These parts included all the brackets, railings for the tank tops, and new gauge mounts because the pressure and vacuum gauges would have to be relocated. The original rear cab supports and roof sheet would be reused although the rear supports would need to be repainted. The most time consuming part of the design turned out to be the windows. Due to their small diameter the frames had to be quite narrow, so I could only just get 4 ba bolts with the smaller 5 ba head size to fit, and even then there would be very little overlap to retain the glass. I also had no idea how I could cut small glass circles; so to solve the overlap and cutting problems I elected to cut the glass into dodecagonal shapes (e.g. 12 straight edges) which I thought would be easier to make. The window holes in the spectacle plate were thus designed with twelve straight sides, but the holes for the 4ba bolts were still so close to the glass aperture that I chose to form them as slots cut contiguously with the twelve sided cut-outs. The other problem with building the cab myself was that I had no way to bend the cab side round to create the front of the water tank. Thankfully a quick browse of the Internet turned up a company that offered laser cutting and bending using a press brake machine. The cutting and bending drawings were emailed to them and within a couple of days I received the reply that they could produce the parts at a very reasonable price. Even better, delivery of the cut and bent parts would only take about a week from placing the order. |
|||
| The
laser cutting company did deliver the parts on schedule but there was a
major problem. The original Feldbahn design, and thus my new
version of it, used a 20mm internal radius for the bend of the cab side
into the water tank front. Sadly the person who had provided the
quotation had not bothered to talk to the brake press operator to see
if they could actually bend a 20mm radius, which it turned out they
could not. The brake press operator thus used a 25mm radius with
the result that the manufactured parts simply did not fit together.
A phone call to the company showed that the 25mm bend radius was
the only option, but since it was their error they would remanufacture
all the parts if I supplied them with revised drawings for the 25mm
radius. So a week later I received another set of cab parts which
I could see were wrong without even opening the parcel as the parcel
was flat. This time they had not bent any of the parts at all !
Third time lucky ? Well not quite as they didn't get the
bend in quite the right place, but as I could cut a pair of water tank
inner sides from all the scrap I now had I accepted the parts and ended
up with water tanks 3mm longer than I had expected. Since the
postage costs of the three deliveries amounted to more than 60% of the
original quoted price the cutting company must have made a significant
loss on the project. | |||
 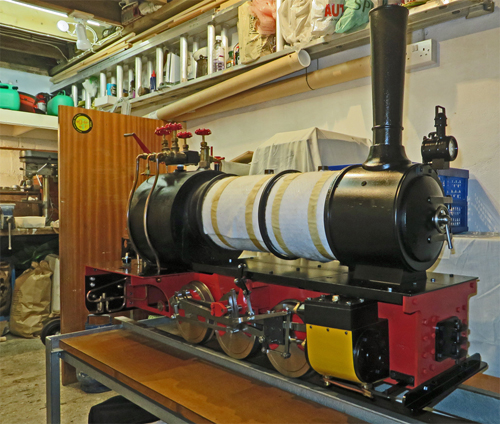 While
the cutting and bending process had been dragging on I had been busy
dismantling the Feldbahn. Removing the cab may seem simple, but
it turned out that in order to remove the cab assembly the boiler
cladding and everything attached to it had to be removed first.
In the end it took an entire day to remove the cab and I had to
resort to some very large tools (the spanner in the photograph is
almost 24" long) to get things apart. While
the cutting and bending process had been dragging on I had been busy
dismantling the Feldbahn. Removing the cab may seem simple, but
it turned out that in order to remove the cab assembly the boiler
cladding and everything attached to it had to be removed first.
In the end it took an entire day to remove the cab and I had to
resort to some very large tools (the spanner in the photograph is
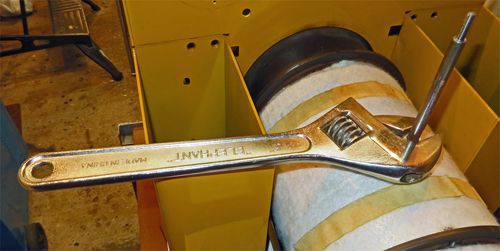
almost 24" long) to get things apart.With the Feldbahn dismantled to the stage shown in the photo the new cab work could commence, but with so much dismantled I decided that it was a good time to also replace the steam valves on the manifold and the whistle valve. You can read about those modifications by going to the relevant sections of the Functional Modifications pages of this website. The other task undertaken before the new cab assembly began was the construction of an assembly jig to replicate the Feldbahn foot plate and running boards. Assembling the new cab on the jig would prevent damage occurring to the Feldbahn during the assembly and welding processes. Thankfully I still had the original cab so once the jig was constructed I could confirm that it was accurate by temporarily fitting the old cab to the jig. Shortly after that I put the old cab on EBay to get it out of my way in the workshop, and was surprised when the buyer who came to collect it turned out to be Station Road Steam. | |||
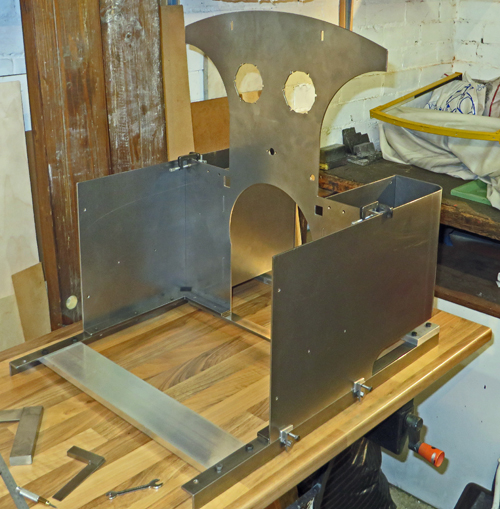 This
photo shows the new cab parts fitted to the jig ready for welding.
Welds that could not be seen once the cab was assembled were MIG
welded but visible welds were made using a TIG welder because the
completed weld (if done properly) can be almost invisible.
Luckily for me there is a skilled TIG welder based at the other
end of the village who is happy to help me out with my projects. This
photo shows the new cab parts fitted to the jig ready for welding.
Welds that could not be seen once the cab was assembled were MIG
welded but visible welds were made using a TIG welder because the
completed weld (if done properly) can be almost invisible.
Luckily for me there is a skilled TIG welder based at the other
end of the village who is happy to help me out with my projects.With the cab assembled to this stage the lack of metal where the spectacle plate rises above the boiler cut out is all too apparent. While designing the parts I had come to the conclusion that if anyone tried pushing the Feldbahn around using the cab roof (which is how we all move the engines when not in steam) the entire structure would probably bend at this point. Thankfully my research into SRAGI No 14 provided the answer to this likely problem. While operating on the sugar plantation the engine had bracing bars fitted between the top of the spectacle plate and the front inner edges of the water tanks. Presumably these bars had been used to stiffen the cab assembly because the photos showed huge piles of discarded sugar cane that was used to fire the engine being carried on the cab roof as well as the tender and water tank tops. Although no longer present on the preserved SRAGI No 14 I decided to fit them to my Feldbahn because they would stiffen up the entire assembly. Examination of the photos also showed a round bar fitted along the lower edge of the cab side roof support so 8mm diameter bars were welded onto my cab side top bars to stiffen them up. With all the welding finished the new cab, old rear roof support, and the old roof were all trial fitted to the Feldbahn and I had the first view of how the rebuilt engine would actually look. Thankfully it all fitted together and the stiffening bars did their job of making the structure strong enough so that the cab didn't bend at that potential weak point above the boiler. Finally at the start of April I had all the parts ready for painting. | |||
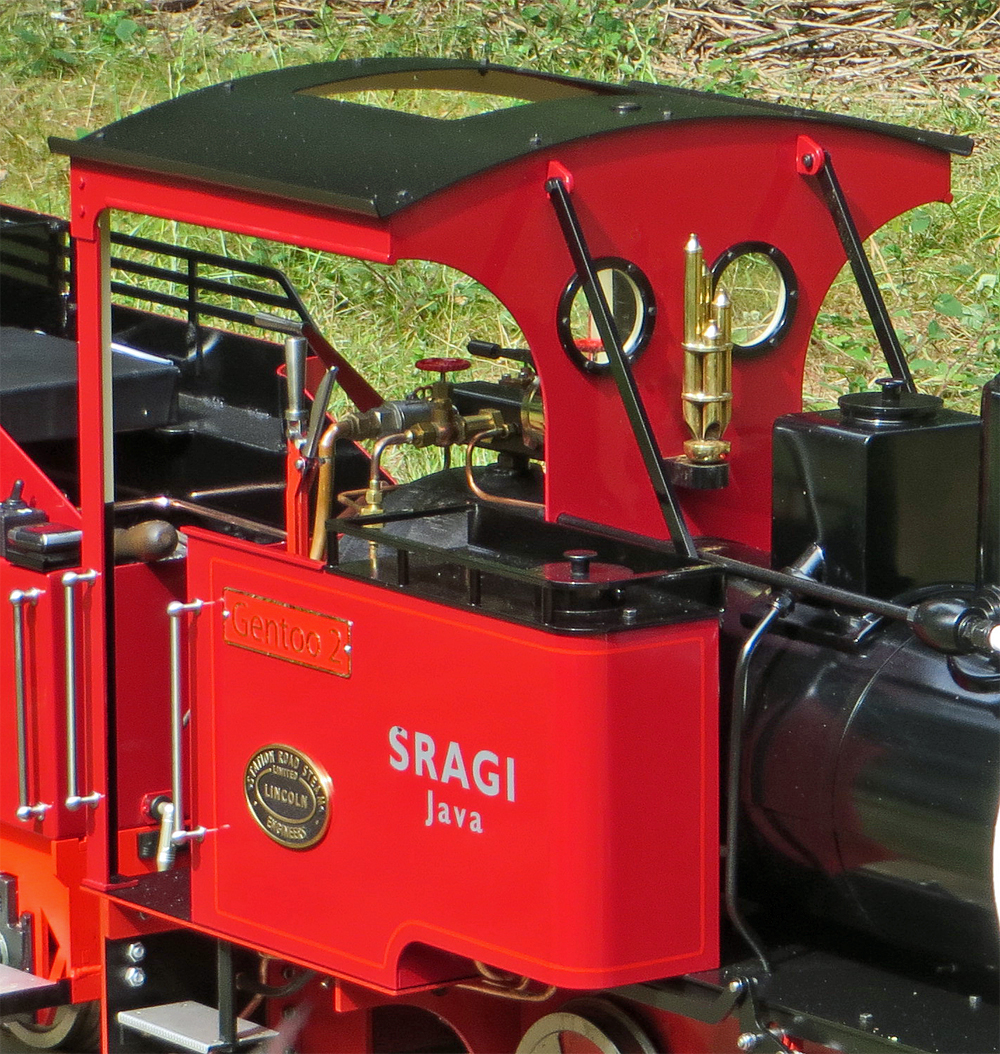 Over
two months later I finally got the parts back from the paint shop and
they looked superb. The ruby red paint had a lovely deep gloss
and painters were rightly proud of what they had achieved. This
photo shows the completed cab on my Feldbahn and you can see the
bracing bars connecting the spectacle plate to the water tanks and the
round stiffening bars along the cab sides under the roof. The
narrowness of the window frames is also obvious. Over
two months later I finally got the parts back from the paint shop and
they looked superb. The ruby red paint had a lovely deep gloss
and painters were rightly proud of what they had achieved. This
photo shows the completed cab on my Feldbahn and you can see the
bracing bars connecting the spectacle plate to the water tanks and the
round stiffening bars along the cab sides under the roof. The
narrowness of the window frames is also obvious.Reassembly of the Feldbahn using the new parts progressed quickly except for the fitting of the rearmost boiler cladding band. The retaining bolt for that band can only be accessed through apertures under the water tanks and is not easy for two people. Trying to use an Allen Key on one side of the engine and a socket screwdriver on the other was simply impossible for one person. Eventually I had to resort to making a jig to hold the Allen key in place while I tightened the nut from the other side using the socket screwdriver. I had been worried that wear marks or discoloration would show on the boiler cladding if the bands and other components ended up in slightly different positions but thankfully it all went back together without any paint blemishes in sight. My biggest problem however was cutting the glass for the spectacle plate windows. You may recall that earlier on this page I had mentioned making the cut-outs twelve sided because I thought straight cuts on glass would be the easiest solution. Well despite having purchased a good quality glass cutter I soon found that I could only cut squares. As soon as I tried to cut the first angle from those squares the glass always cracked in the wrong place. Hours later, and with most of three sheets of 3mm glass transformed into scrap I had to look for another solution. This is where living in my (so called) village has its advantages. Not only do I have a local one man machine shop and a local one man welding business, it turned out that I also had a local glass studio. A quick phone call and I was invited along that same evening to watch Jan quickly cut two precise circles from my glass. Thanks to Koru Arts I now had a pair of glasses to complete the spectacle plate. You may also notice in the photo that the water tank top plates have been extended back into the cab area and fitted with rails to a similar design of that on the preserved SRAGI No 14. I had made these plates to be easily detached from the water tank pockets even though I could have welded them in place. With boiler feed water being carried on the tender there is no longer any need for water tanks on the engine but I do use the original water tank filler holes as camera attachment points when filming my engine so the filler caps and holes have been retained. However before the final assembly could be completed there was one more sub contract project to be undertaken; the coach lining. | |||
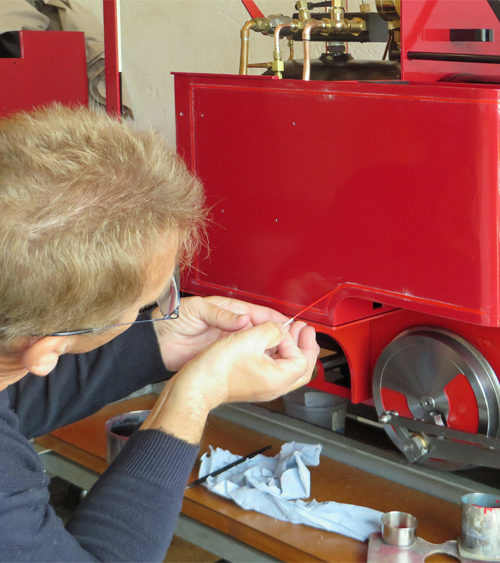 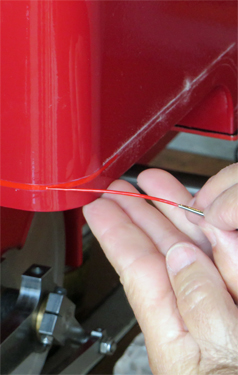 Coach
lining is something I know I am not very good at having tried it on my
4" scale Tasker traction engine. When that engine was being
repainted I resorted to using lining tape sold for car customising to
apply the coach lines but this time round I wanted the real thing, not
stick on tapes. So it was back to the Internet where I was able
to find a reasonably local coach lining service. A few days later
Phil Gofton turned up at my garage and I had a very enjoyable day
watching him apply the lining. Coach
lining is something I know I am not very good at having tried it on my
4" scale Tasker traction engine. When that engine was being
repainted I resorted to using lining tape sold for car customising to
apply the coach lines but this time round I wanted the real thing, not
stick on tapes. So it was back to the Internet where I was able
to find a reasonably local coach lining service. A few days later
Phil Gofton turned up at my garage and I had a very enjoyable day
watching him apply the lining.It turned out that Phil had been coach lining and painting since 1971, and has worked on many cars at the Beaulieu motor museum. Although I learnt a lot that day there is no way I could ever cope with the lining. How he kept his hands steady enough to wield the two inch long brush was a real mystery to me, especially when there was nothing that he could rest against. In the photos you can see that he has applied a pair of chalk guide lines to the panels that he used as guides when painting, but maintaining a constant line width did not look easy. Phil did offer to let me try, saying that he could wipe off my errors and do it again but that was an offer I quickly declined. He has had a lifetime of practice to perfect his skills which I could never hope to replicate. Interestingly Phil said that far from being a dying trade he is much busier now and rarely has a slack day. Obviously people are recognising that a craftsman's skills are still very relevant in the current age. | |||
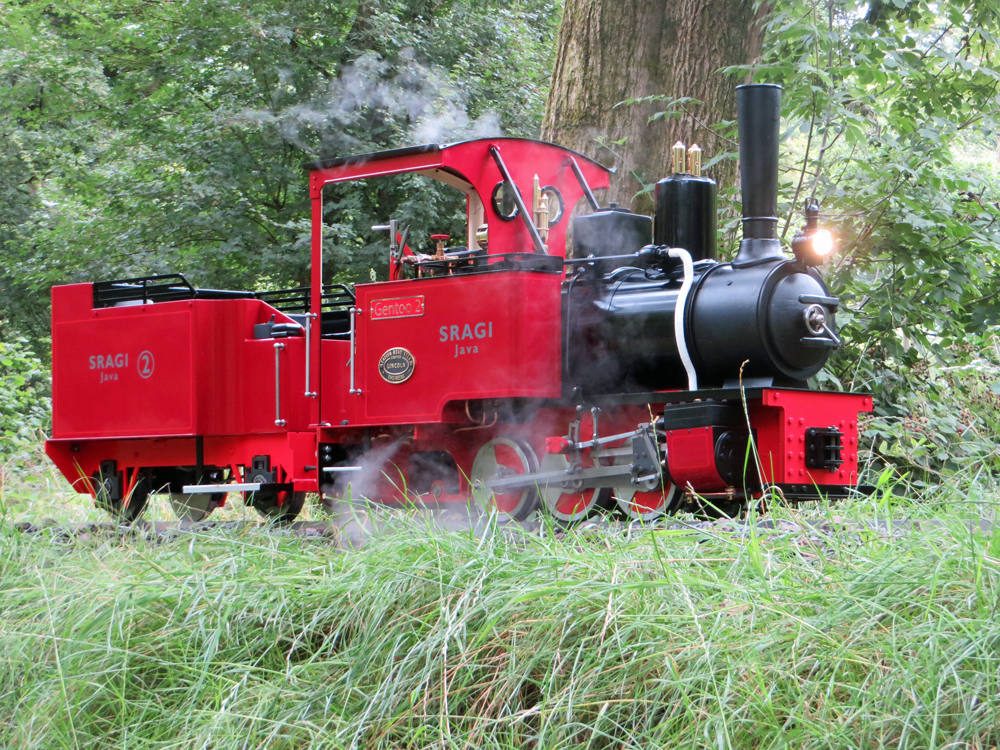
| After
allowing a few days for the coach lines to fully harden the final
assembly of the Feldbahn could be completed. Finishing touches
included the pair of dummy brass safety valves (I later found out that
Station Road Steam have also made some so I could have saved myself a
lot of machining) and changing the dummy steam pipe from black to
white. This pipe from the Feldbahn's dummy regulator is supplied
wrapped with string and painted black to represent lagging, but on the
preserved SRAGI No 14 it is clad in white using a replacement for
asbestos. The simplest way I found of making my Feldbahn's pipe
took right was to sleeve the factory supplied string wrapped pipe with
white heat shrink sleeving. That completed the transformation of
my Feldbahn into its current 0-6-0 tender engine format, but why it
took another two months to get out on the track is a story not worth
telling here. Below is a single photo of the completed engine and tender. You can see many more in the Gallery pages of this website. | |||
 |